You can easily manage your blog by using a blogging platform “WordPress” through a database such as “MySQL” or “MariaDB“. It is rather convenient to install and operate both. But is that enough? Shouldn’t the data also be secured? Despite the necessity, isn’t it too hard to secure data for beginners who don’t know anything about data security?
We created “How to Use MyDiamo with WordPress” to show how essential yet easy it is to secure data. This post is about using WordPress as a blogging platform. However, MyDiamo can be applied to different types of websites. In part 1, we covered the installation procedure of MyDiamo. It is easy and straightforward to install MyDiamo with its Installation Guide.
In part 2, we will show you how to operate MyDiamo with WordPress. We will guide you through basic column encryption and decryption steps.
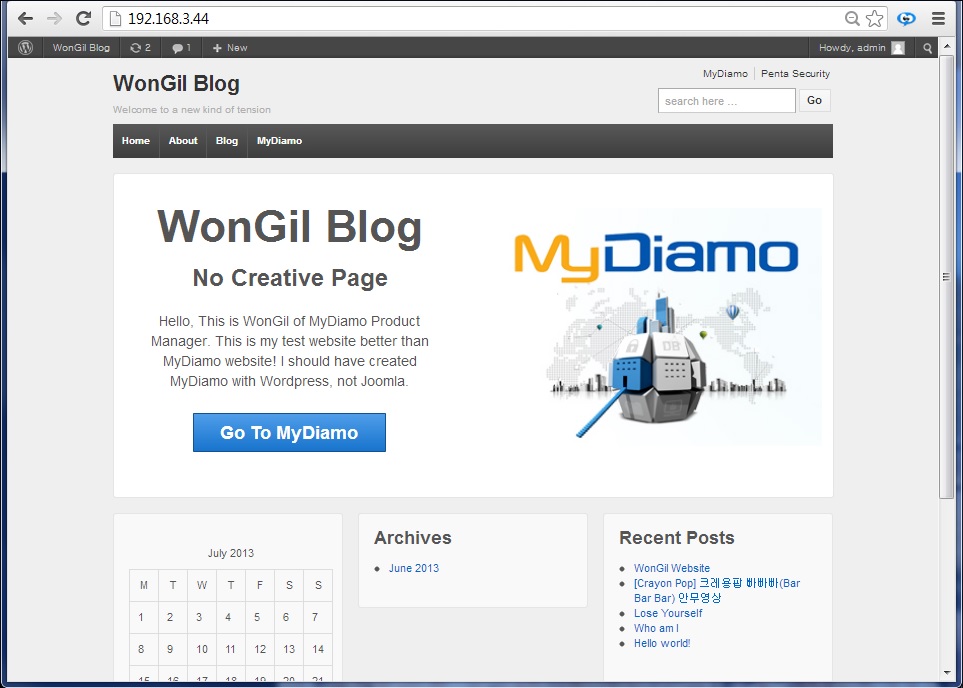
Here is MyDiamo with a WordPress Test Blog
First of all, in order to show the encrypted data clearly, data was created from the MySQL database. Information for “mydiamo_user” can be seen below.
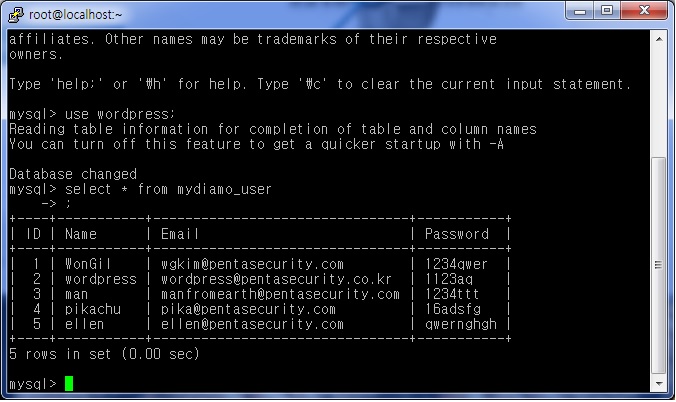
Also, the table information for “mydiamo_user” can be seen in the sample blog shown below.

If you don’t want to disclose password information, you can always encrypt or exercise access control over the data. However, in most file encryption tools you can only encrypt the whole data. If you want to selectively encrypt data and partially, MyDiamo can do that for you.
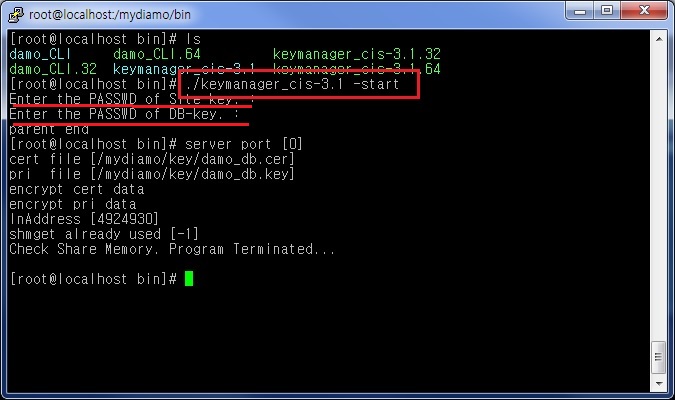
Execute Key Manager and CLI
1) Execute Key Manager
Before logging into D’Amo CLI, the key manager must be executed first.
(Every time you reboot your system, you will have to initiate the key manager again. If not, it will fail to execute the CLI.)
./keymanager_cis-3.1 -start
Enter the Password of the Website Key and DB Key.
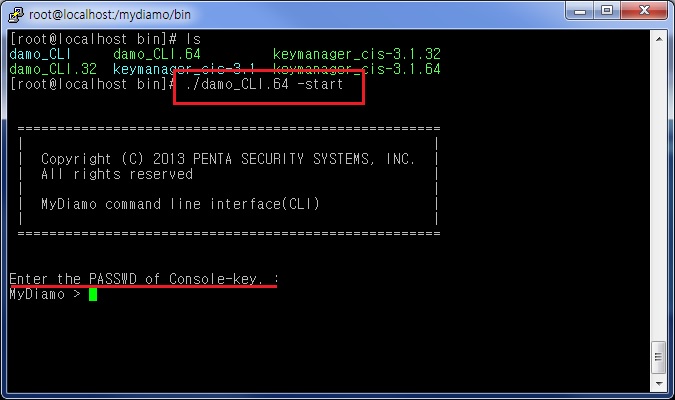
2) Execute D’Amo CLI
# ./damo_CLI.64 –start
Also enter the Password of the Console-Key.
Column-Encryption
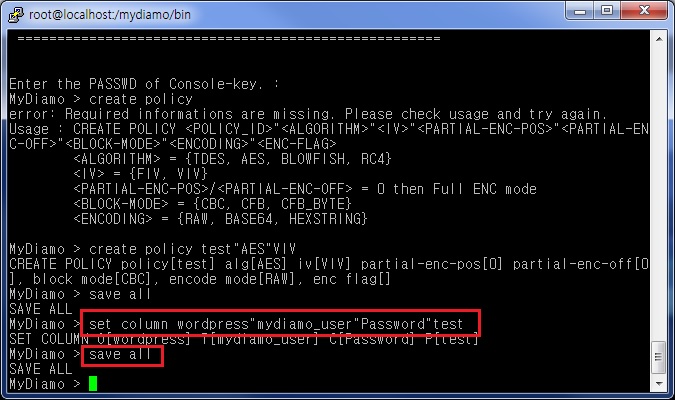
1) Issue Create Policy Command
This step is for creating a policy for encrypting. A policy is a group of settings for encryption. You need at least one policy in order to encrypt.
We need to set Policy_ID to be “test”, algorithm to be “AES”, and IV to be “VIV”. So here we type:
create policy test”AES”VIV
on the command line.
You must save all of the settings by command, and to do so type save all.
Tip: If you ONLY type create policy, you can check the format and usage of the command.

2) Issue Set Column Command
Now configure which column we want to apply the “test” policy to. Type:
set column wordpress”mydiamo_user”Password”test
This is because we want to apply our policy “test” to the “Password” column on the “mydiamo_user” table, of which the owner is “wordpress”.
Tip: If you type only set column, you can check the format and usage of the command.
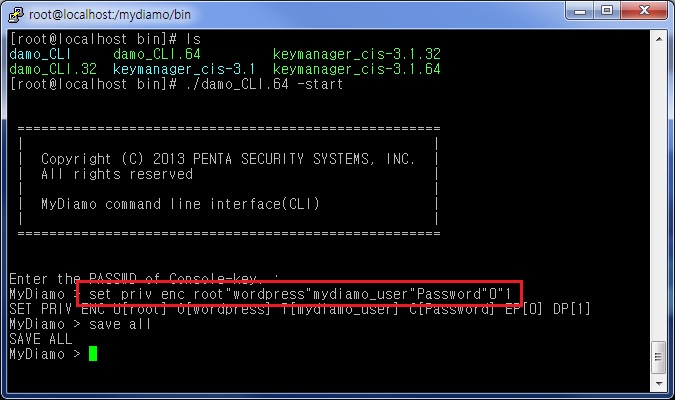
3) Issue Set Priv Enc Command
In this step, you have to set the encryption privileges for the column. This is what gives privilege of encryption to users. Type:
set priv enc root”wordpress”mydiamo_user”Password”1″0
This means that we give privilege to the user, “root”, on encryption of “Password” column in “mydiamo_user” table, of which the owner is “wordpress”.
Remember, you must always save all of the settings before applying.

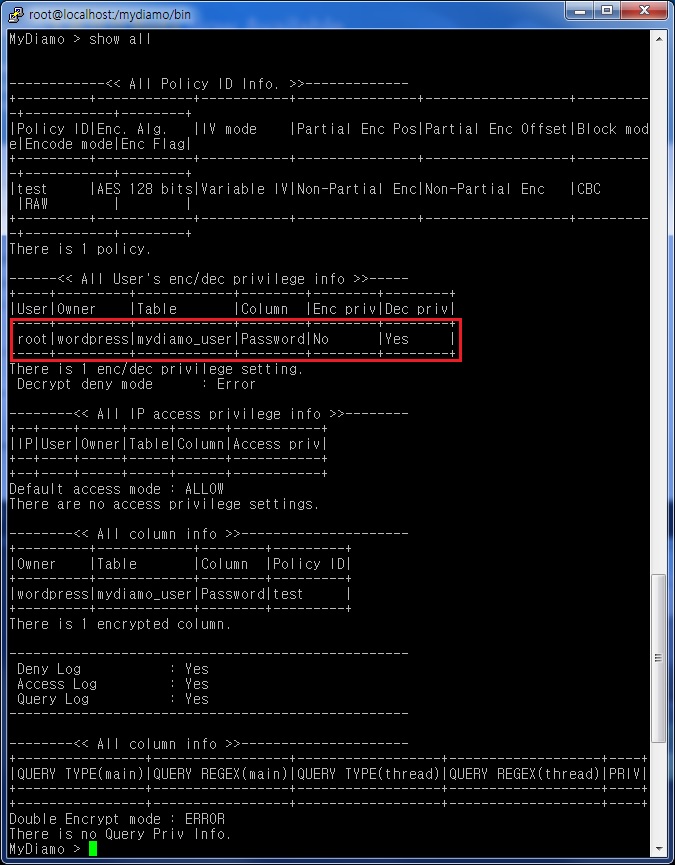
Tip: When you type show all, you can check all of the settings you configured. Apply the delete command to delete the policy or settings.

Now we’re all set for encrypting the password of our user table.
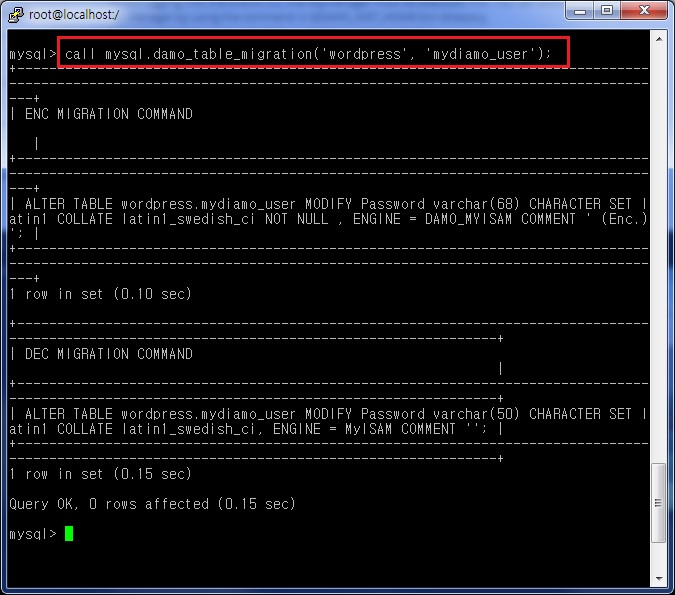
4) Encrypt!
Exit the MyDiamo program, and access to the database (in our example, mysql). Type:
call mysql.damo_table_migration(‘wordpress’, ‘mydiamo_user’);
and our table is encrypted.
When we check our table, the “Password” is masked.
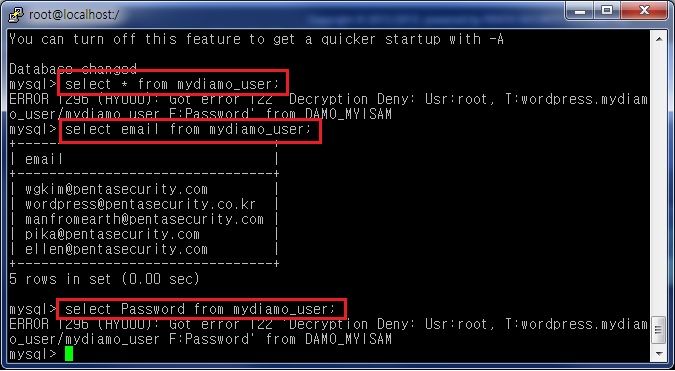
You can see that only the Password column has been encrypted.
When encrypted, we want our “Password” column to be masked, not shown as error message. Therefore, set up the environment for the decryption deny message as masking.
set env decrypt deny masking
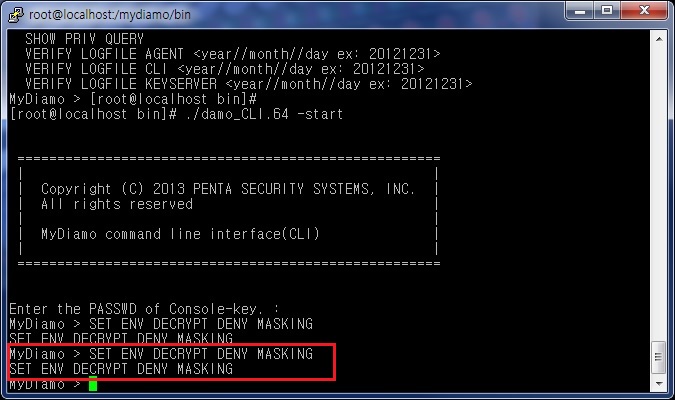
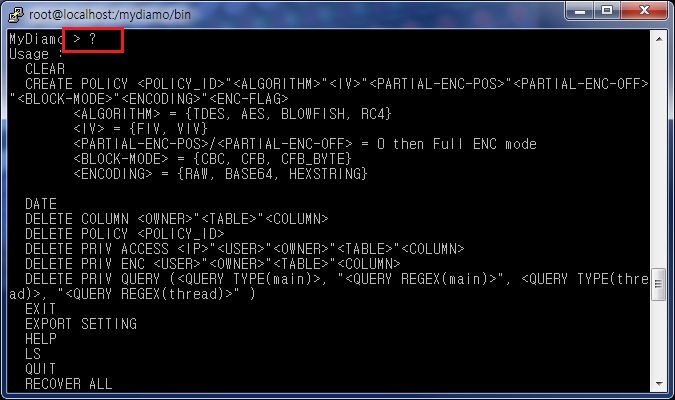
How do we know the commands for these kinds of settings? Here is a tip: If you want to see all the commands, type
? (question mark).
Now let’s see if the setting for the masking function has worked.

You can see that only the column “Password” is masked. The error message did not show up as before when selecting the whole table.
What about the blog?

The blog also shows the table with only the “Password” column masked.
Column-Decryption
1) Issue Set Priv Enc Command
After running the MyDiamo program, type
set priv enc root”wordpress”mydiamo_user”Password”0″1
Now we give decryption privileges to user “root”.
When checking the settings with show all, we can see that the “Users enc/dec privilege info” has changed.
2) Decrypt
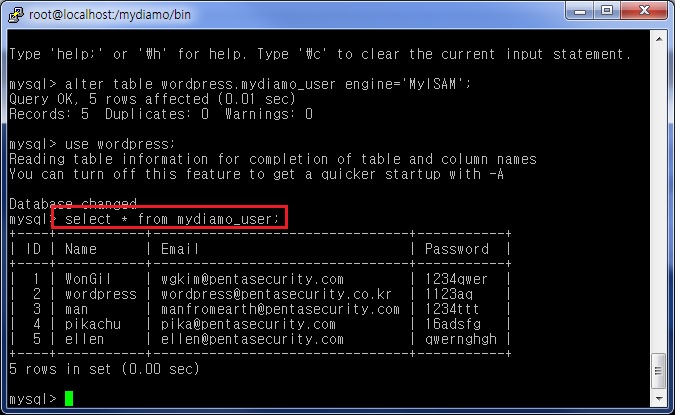
Exit the MyDiamo program, and access to the database (in our example, mysql). Type:
alter table wordpress.mydiamo_user engine=’MyISAM’;

Now the “Password” column in “mydiamo_user” table is decrypted.
These are the basic steps of operating MyDiamo with WordPress, including the encryption and decryption of partial data. You can also follow the steps on MyDiamo’s guide page.
In the next post (part 3), we will cover an attack scenario which can happen to your blog.